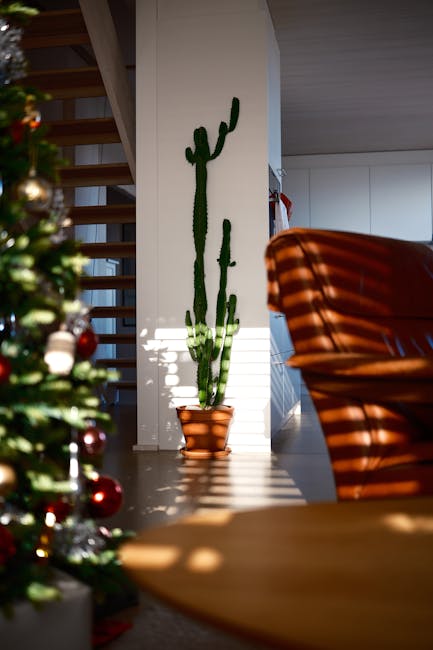
How to Propagate a Christmas Cactus: A Complete Guide for Blooming Success
How to Propagate a Christmas Cactus: A Complete Guide for Blooming Success
The Christmas cactus, with its vibrant blooms during the holiday season, is a beloved houseplant. But what happens when you want to share this festive joy, or simply increase your collection? Propagation is the key, and it’s surprisingly easy! This comprehensive guide will walk you through every step, ensuring your Christmas cactus cuttings thrive and eventually blossom, bringing you years of holiday cheer.
Understanding Christmas Cactus Propagation
Before diving into the methods, understanding the plant itself is crucial. Christmas cacti (Schlumbergera bridgesii) are epiphytes, meaning they naturally grow on other plants in their native habitats, clinging to trees and rocks. This influences how they propagate; unlike many plants that rely on seeds, Christmas cacti are easily propagated vegetatively, using stem cuttings.
This vegetative propagation method is highly successful due to the cactus’s ability to easily develop roots from stem segments. This makes it an ideal plant for beginners interested in expanding their plant collection or sharing the beauty of their Christmas cactus with others.

Methods of Propagating Christmas Cactus
There are two primary methods for propagating Christmas cacti: using stem cuttings in water or directly in soil. Both methods are effective, but each has its own advantages and disadvantages. Let’s explore them in detail:
1. Propagation in Water: A Step-by-Step Guide
- Selecting Cuttings: Choose healthy, mature stem segments. Look for segments that are firm, free from diseases or pests, and at least 3-4 inches long. The segments should have several joints, as these are where roots will develop.
- Preparing the Cuttings: Carefully remove the chosen stem segment, using clean, sharp scissors or a knife. Make a clean cut at the joint, avoiding crushing or damaging the stem. Allow the cut end to callous over for a few days. This prevents rot and encourages root development.
- Placing Cuttings in Water: Fill a clean glass or jar with lukewarm, filtered water. Place the cuttings in the water, ensuring only the bottom joint (or two) is submerged. Avoid submerging the entire cutting, as this can lead to rot.
- Providing Light and Temperature: Place the container in a location with bright, indirect light. Avoid direct sunlight, which can scorch the cuttings. Maintain a warm room temperature, ideally between 65-75°F (18-24°C).
- Changing the Water: Change the water every 2-3 days, ensuring the water remains fresh and free from bacteria. This is crucial to prevent the cuttings from rotting.
- Root Development: You should see root development within a few weeks. Once the roots are about an inch long, the cutting is ready to be potted.
- Planting in Soil: Pot the cutting in a well-draining cactus potting mix. Gently handle the roots to avoid damage. Water lightly after planting.
2. Propagation in Soil: A Direct Approach
- Selecting Cuttings: Similar to the water propagation method, choose healthy, mature stem segments that are at least 3-4 inches long.
- Preparing Cuttings and Soil: Allow the cut end to callous over for a few days. Prepare a well-draining cactus and succulent potting mix. This mix ensures proper drainage and aeration, preventing root rot.
- Planting the Cuttings: Gently place the cutting onto the prepared soil, ensuring a portion of the lower joint is in contact with the soil. Do not bury the entire cutting deeply, as this can hinder root development. You can gently press the cutting into the soil to help it remain in place.
- Watering and Light: Water the soil lightly after planting, just enough to moisten it. Avoid overwatering, which can lead to rot. Place the pot in a location with bright, indirect sunlight.
- Maintaining Humidity: To increase the success rate, you can cover the cutting with a clear plastic bag or humidity dome to maintain higher humidity levels. Remove the cover for a few hours each day to prevent fungal growth.
- Root Development: You may not see immediate results, but roots will develop over several weeks. Avoid moving the cutting until you see signs of growth.
Tips for Successful Propagation
- Use Clean Tools: Always use clean, sharp scissors or a knife to prevent the spread of diseases.
- Well-Draining Soil: A well-draining potting mix is essential to prevent root rot, a common problem for Christmas cacti.
- Bright, Indirect Light: Avoid direct sunlight, which can scorch the cuttings. Bright, indirect light is optimal.
- Proper Watering: Avoid overwatering, as this is a common cause of failure. Water only when the soil is dry to the touch.
- Patience: Propagation takes time. Don’t be discouraged if you don’t see immediate results. Be patient and consistently provide the necessary care.
- Pest and Disease Control: Regularly inspect the cuttings for pests or diseases. Treat any infestations or diseases promptly.
Troubleshooting Common Problems
While propagation is generally straightforward, some challenges can arise. Let’s look at some common problems and their solutions:
Root Rot:
This is a common issue, often caused by overwatering or poorly draining soil. Symptoms include mushy or black stems and roots. If root rot occurs, remove the affected portions and repot the cutting in fresh, well-draining soil. Reduce watering frequency.
Slow Growth:
Slow growth can be attributed to insufficient light, improper watering, or low temperatures. Ensure your cuttings receive adequate bright, indirect light and maintain a consistent warm temperature. Adjust watering frequency as needed.

Fungal Growth:
Fungal growth can occur in humid conditions. Ensure proper ventilation and avoid overwatering. If fungal growth appears, treat it promptly with a fungicide.
Caring for Your New Christmas Cactus
Once your Christmas cactus cuttings have successfully rooted and grown, it’s time to give them the care they deserve to ensure they thrive and eventually bloom. This involves providing the right amount of sunlight, water, and nutrients:
- Sunlight: Place your Christmas cactus in a location with bright, indirect light. Avoid direct sunlight, which can scorch the leaves.
- Watering: Water your Christmas cactus thoroughly when the soil is dry to the touch. Avoid overwatering, which can lead to root rot.
- Fertilizing: Fertilize your Christmas cactus during the growing season (spring and summer) with a balanced, water-soluble fertilizer. Reduce or stop fertilizing during the dormant period (fall and winter).
- Repotting: Repot your Christmas cactus every 2-3 years or when it becomes root-bound. Use a well-draining cactus potting mix.
By following these guidelines, you’ll be well on your way to enjoying many years of vibrant blooms from your propagated Christmas cacti, year after year. Happy propagating!