How to Propagate Snake Plants in Water: A Comprehensive Guide for Beginners
The Allure of Snake Plant Propagation
Snake plants, also known as Sansevieria trifasciata, are incredibly popular houseplants due to their striking appearance, resilience, and air-purifying qualities. Their ability to thrive in low-light conditions and tolerate infrequent watering makes them ideal for even the most novice plant parents. But the true beauty of snake plants lies in their ease of propagation. Unlike some plants that require specialized techniques, propagating snake plants, especially in water, is a surprisingly straightforward process that even beginners can master. This comprehensive guide will walk you through each step, ensuring you’ll soon be enjoying a thriving collection of these low-maintenance beauties.

Why Propagate in Water?
While snake plants can be propagated in soil, water propagation offers several advantages. Firstly, it allows for a clearer observation of root development. You can easily monitor the progress of root growth and intervene if any issues arise. Secondly, water propagation is generally faster than soil propagation, leading to quicker results. Finally, it’s a cleaner method, minimizing the risk of soil-borne diseases that might affect the cuttings.
Choosing the Right Cutting
The success of your propagation hinges on selecting healthy cuttings. Here’s what to look for:

- Healthy Parent Plant: Start with a vigorous, disease-free snake plant. Avoid using cuttings from a struggling plant.
- Leaf Selection: Choose mature, healthy leaves that are free from blemishes, pests, or signs of disease. Ideally, select leaves that are firm and plump, indicating good health.
- Leaf Size: While smaller leaves can work, larger, healthier leaves generally offer a higher success rate. Aim for leaves at least 6 inches long. You can also use a whole leaf, but this will slow down the propagation.
Preparing Your Cuttings
Proper preparation of your cuttings is crucial for successful water propagation. Follow these steps:
- Sterilize Your Tools: Before making any cuts, sterilize your knife or shears with rubbing alcohol to prevent the introduction of bacteria or fungi.
- Making the Cut: Using your sterilized knife or shears, make a clean, sharp cut at the base of the leaf. A clean cut promotes quicker root development and reduces the risk of rotting.
- Allowing to Callus (Optional): Some propagators recommend allowing the cut end to callus over for a few days before placing it in water. This allows the wound to seal, reducing the risk of rot. However, this step isn’t strictly necessary for successful propagation.
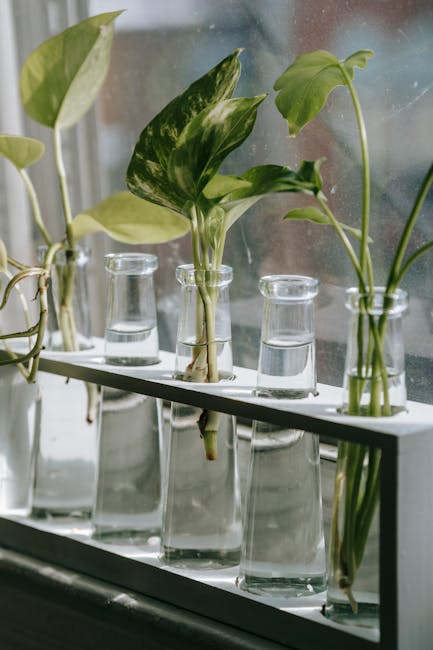
- Choosing a Container: Select a clean glass or clear plastic container that’s large enough to hold your cutting comfortably without overcrowding. Clear containers allow for easy monitoring of root growth.
- Filling with Water: Fill your container with filtered or distilled water. Avoid using tap water as it may contain chlorine or other chemicals that can harm your cuttings.
The Propagation Process
Once your cuttings are prepared and your container is ready, the propagation process is straightforward:
- Submerge the Cuttings: Submerge only the bottom inch or two of the leaf cutting in the water. Do not fully submerge the entire cutting. Avoid allowing the entire leaf to sit in water, as this can lead to rotting.
- Placement: Place the container in a location with bright, indirect sunlight. Avoid direct sunlight, which can scorch the leaves.
- Water Changes: Change the water every 2-3 days to prevent the growth of bacteria and algae. Use fresh, filtered or distilled water each time.
- Monitoring Root Development: Within a few weeks, you should see small roots developing from the base of the cutting. This indicates successful propagation. The more roots the leaf produces, the better the chances of survival and flourishing once transplanted.
- Patience is Key: Root development can take several weeks, depending on the size of the cutting and environmental conditions. Be patient and continue to monitor and change the water regularly.
Transplanting Your Propagated Snake Plants
Once the roots have grown to approximately 1-2 inches in length, you’re ready to transplant your propagated snake plants into soil. Here’s how:
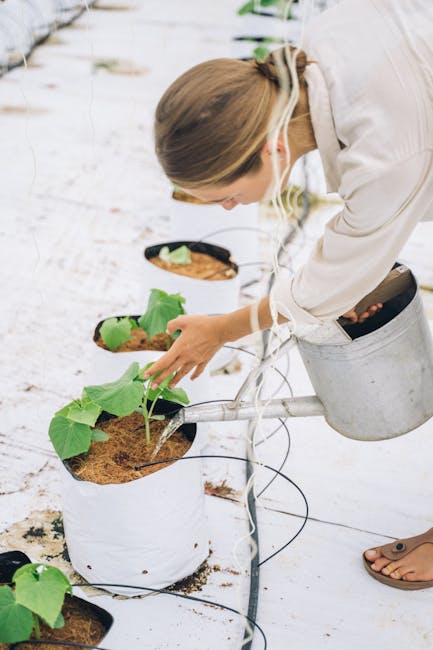
- Choosing the Right Pot: Select a small pot with drainage holes to prevent overwatering. Terracotta pots are a good choice as they allow for better aeration.
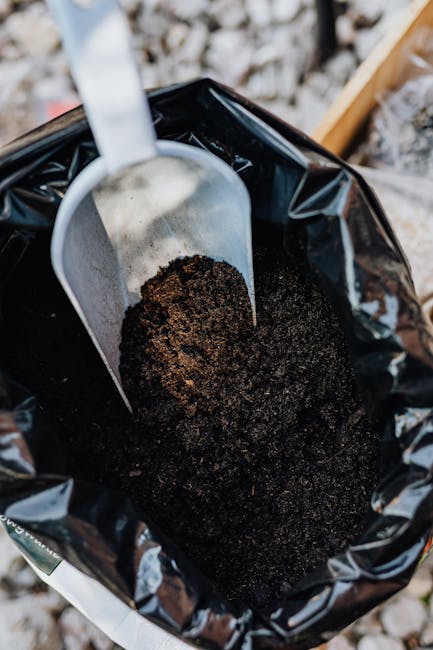
- Potting Mix: Use a well-draining potting mix specifically formulated for succulents and cacti. Avoid using garden soil, which is often too dense and retains too much moisture.
- Planting: Gently place the propagated cutting into the pot, ensuring the roots are spread out. Fill in the remaining space with potting mix, leaving a small space at the top of the pot for watering.
- Watering: Water thoroughly after planting, but allow the soil to dry out slightly before watering again. Avoid overwatering, which can lead to root rot.
- Post-Transplant Care: Place the newly potted plants in a bright location, away from direct sunlight. Water infrequently, allowing the soil to dry out completely between waterings. Monitor for any signs of stress, such as yellowing leaves.
Troubleshooting Common Problems
Despite its ease, snake plant propagation in water can sometimes encounter challenges. Here are some common issues and their solutions:
- Rotting: If the cutting starts to rot, it’s likely due to bacterial or fungal infection. Remove the affected portion and change the water frequently. Consider using a fungicide if necessary.
- No Root Development: If no roots appear after several weeks, try changing the water more frequently or ensuring the cutting isn’t fully submerged. Try using different leaf cuttings.
- Algae Growth: Algae can develop in the water. To prevent this, change the water regularly and avoid exposing the container to direct sunlight.
Beyond the Basics: Advanced Techniques
Once you’ve mastered the basic water propagation method, you can experiment with more advanced techniques. These include:
- Using rooting hormone: Rooting hormones can accelerate root development. Dip the cut end of the leaf in rooting hormone before placing it in water.
- Propagating from leaf sections: You can also propagate snake plants from smaller leaf sections, though the success rate may be lower. Cut the leaf into smaller pieces, ensuring that each piece contains some healthy tissue, and propagate them as described above.
- Different Water Sources: While distilled or filtered water is preferred, you can also experiment with rainwater, once collected and clarified.
Conclusion
Propagating snake plants in water is a rewarding and relatively simple process. By following these steps and paying attention to the health of your cuttings, you’ll soon have a thriving collection of these beautiful and resilient plants. Remember patience and consistent care are key to success. Happy propagating!